
Reviewed · MAUI
Epoxy Resin Art and Craft Coaster Set Experience
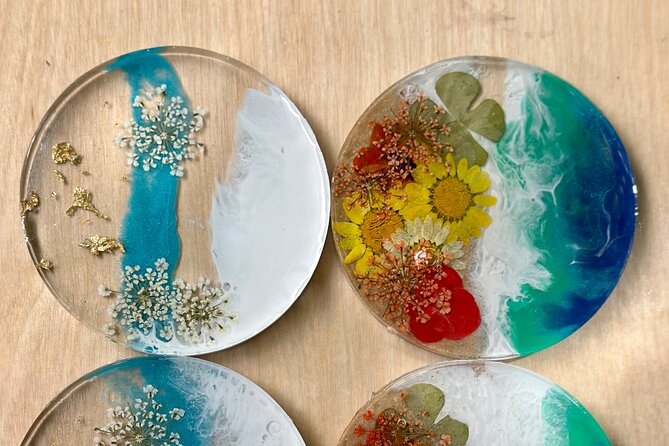
A resin class in Maui beats another beach day. In this 1.5-hour workshop with Yulia Maui Art, you make a set of 4 food-safe coasters using slow curing epoxy, dried botanicals, stones, and gold leaf. It is hands-on art, but with real technique and safety built in.
I especially like that you get step by step guidance for the full process, from measuring and mixing to professional looking finishing. One consideration: this is not for kids under 5, and it is also not suitable for pregnant women, since you will work with resin and tools.
Key Highlights Worth Your Time
- Food-safe resin results: your finished coasters are made to protect surfaces while looking gorgeous.
- Slow curing epoxy: more working time to pour, place decorations, and refine the look.
- Natural materials plus gold leaf: you use dried flowers, leaves, stones, and metallic accents for a high-end look.
- Real technique training: you practice measuring, mixing, coloring, pouring, and finishing, not just a quick craft.
- Heat tools included: you learn how to use a heat gun and torch as part of the process.
- Small group size: the class caps at 12 people, so you are not lost in a crowd.
Epoxy Resin Coaster Art in Maui: What You’ll Be Making
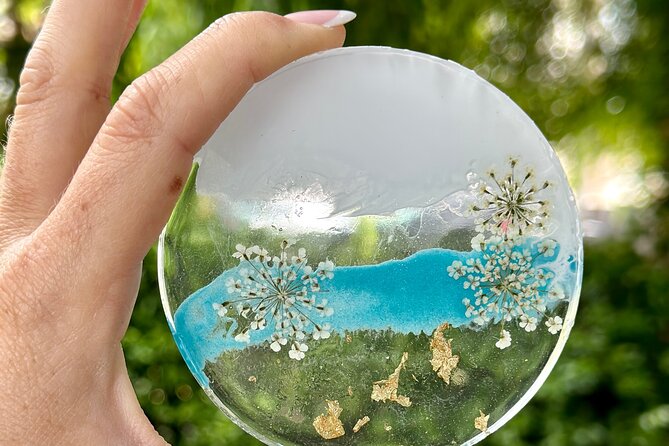
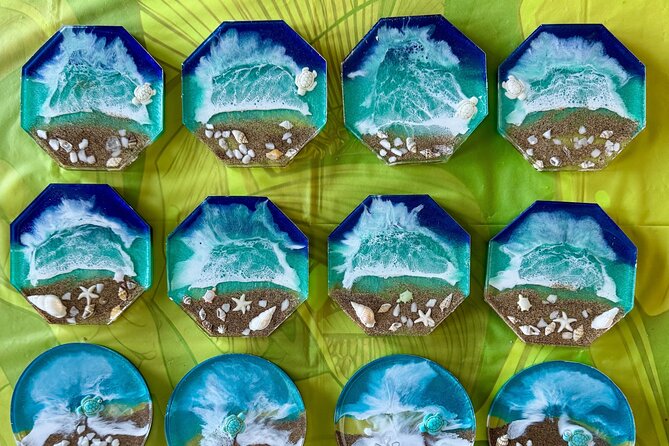
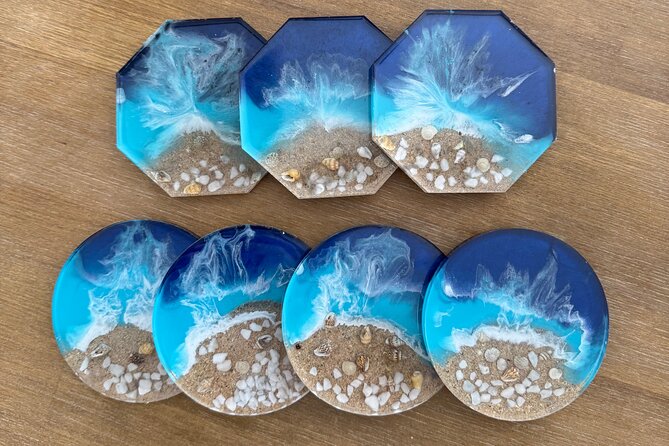
This class centers on a very doable art goal: four matching coasters you can actually use. You will build them using resin plus natural textures and visual sparkle, including dried flowers, leaves, stones, and gold leaf. The result is the kind of handmade set that looks special on day one and still earns its keep as everyday décor.
You are also working with slow curing epoxy resin, which matters more than it sounds. It usually gives you breathing room to measure, mix, pour, and adjust details without the project rushing past you.
You can also read our reviews of more tours and experiences in Maui.


Your Base Ingredients: Materials Provided (And Why That’s a Big Deal)
You do not walk in and wonder what you are supposed to buy. The class provides a whole set of materials and decorative elements so you can focus on design and technique.
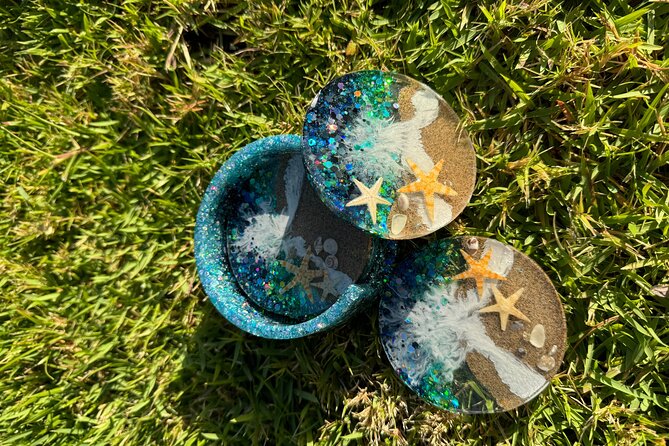
In the kit, you will have items like sea shells and small ocean themed figurines, including turtle, sea star, and shark shapes. You will also find sand, glitter, gem stones, and colored glass. That mix makes it easy to go ocean inspired, but it also supports other styles if you prefer a more botanical or earthy look.
Bottled water and juice are included, which helps when you are spending time mixing and pouring. And if you want a more relaxed vibe, you can bring your own alcohol since alcoholic beverages are not included.
The Paia and Ho’okipa Stops: How This Outing Fits Together
Your outing has two stops listed: Paia and Ho’okipa Beach Park. In practice, think of these as a chance to anchor your creative day with Maui scenery before or around your workshop time.
Paia is a fun place to start because it feels like a real community, not just a postcard stop. Ho’okipa Beach Park is the kind of spot that gives you instant visual rewards, so it pairs well with the ocean craft theme built into the coaster materials like shells and sea inspired pieces.
I would not count on these stops being the main event, though. The real draw is the hands-on resin work and the fact you leave with something you made.
Safety and Setup: Gloves, Aprons, and Resin Handling
Resin crafts look easy in videos, but the class does the right thing by teaching prep and safety. You will receive gloves and aprons as part of the personal protective equipment, plus other PPE.
The instructor covers safety and preparation tips, then moves into measuring, mixing, coloring, and pouring. That sequence is important. If you skip the prep and get casual with mixing ratios or pigments, your final coaster can end up cloudy, uneven, or just not as clean looking as you hoped.
This is also why the class has limits. It is not suitable for children under 5, and it is not suitable for pregnant women. If either applies to you, choose another Maui activity instead.
The Technique Core: Measuring, Mixing, Coloring, and Pouring
This workshop is built around the workflow you need for resin that looks polished. You learn how to measure and mix the epoxy resin, then how to color it and blend pigments for consistent results.
If you have ever made something with craft paint, you already get the idea. Resin is different, because you are working with chemical mixing and a thin liquid that turns into a clear, stable finish. This class keeps you on track with clear steps, which is a lot more valuable than random experimentation.
A neat detail is that you will also learn how to choose the right pigments for your look. That matters because some colors can behave differently in resin, and mixing choices affect how vibrant or muted the final pieces become.


Designing With Botanicals and Ocean Pieces
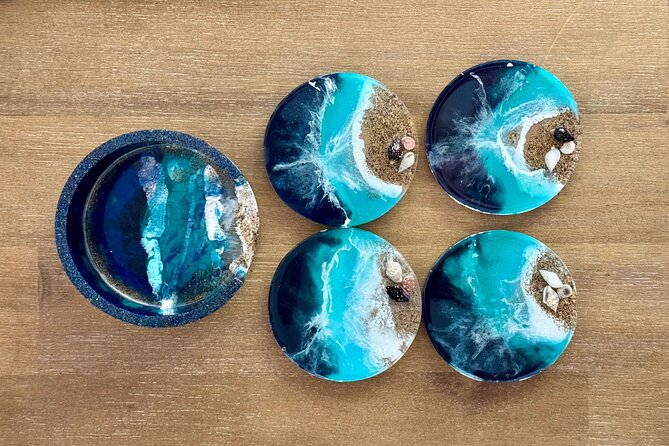
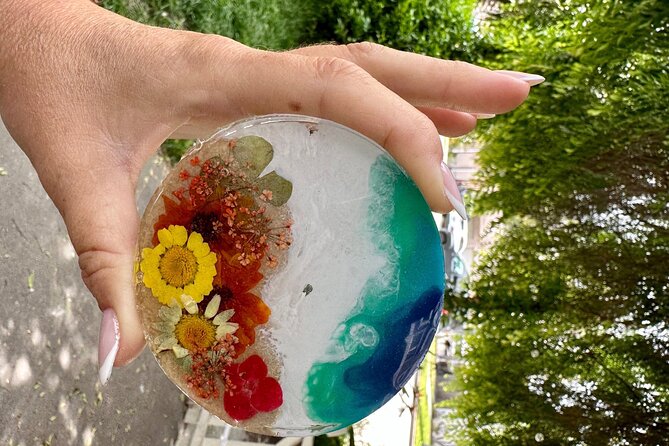
Your coasters are not just a pour and done project. You will choose decorations, including flowers, dried leaves, stones, and other inserts.
You will also use gold leaf, which is one of the fastest ways to make an amateur craft look like a design piece. Gold leaf can look messy if it is applied casually, so the value here is learning how to work with it in a resin environment, not just sprinkling it on top.
When you are selecting what to place, think about balance. A coaster looks best when the decorations are interesting but not overcrowded, and when you leave clean space where the coaster can sit smoothly. The class gives you the structure, but you still get creative control over how “ocean” and how “botanical” you want each coaster to feel.
Heat Gun and Torch: Where the Magic Actually Happens
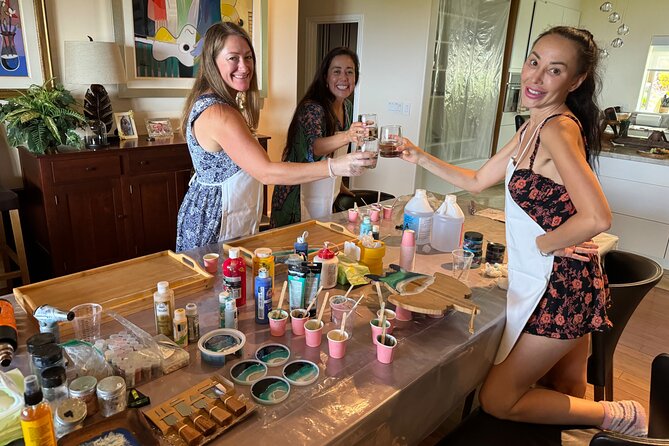
Part of the workshop covers how to work with a heat gun and torch. That is a key part of getting resin to settle and finish well, especially around embedded elements and surface texture.
The benefit of learning this in person is timing and technique. You can try to copy what you see online, but resin is unforgiving. In the class setting, you can follow the instructor’s guidance for how to approach the tools while the material is in the right stage.
Follow the process carefully. If you rush, or if you use too much heat, you can end up with unwanted surface effects.
Preparing Your Mold and Finishing Like You Mean It
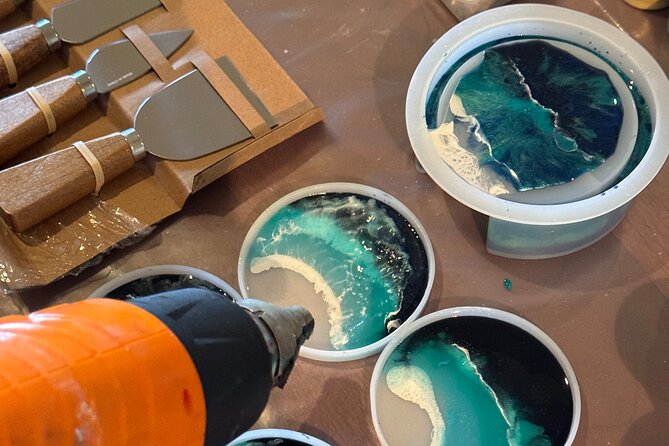
You will also learn how to prepare your mold, then how to finish the pieces professionally. “Finishing” is where crafts either look handmade or look unfinished.
That finishing step is what turns a fun DIY afternoon into an item you feel proud to display or gift. And because the resin is described as food-safe, your coasters are positioned as functional home décor, not just display art.
You will end at the original meeting point, back in Paia, so your day stays contained. You do not need to build an extra plan around the class.
What You’ll Take Home: A Matching Set of 4 Coasters
The class outcome is clear: you create a set of 4 coasters. Each coaster can match the overall theme while still letting you personalize the details. That is what makes the set work as a gift.
You might also come away thinking, I could make these for every season, every holiday, or every trip. A coaster set is small enough to finish as a craft project, but it is still big enough to feel like a real keepsake.
In other words, you get something that looks good on a coffee table and not just on your phone screen.
Price and Value: Is $135 Fair for Maui Resin Coasters?
At $135.00 per person for about 1 hour 30 minutes, you are paying for more than a craft kit. You are paying for instruction in epoxy resin technique, plus PPE, plus a materials set with ocean themed pieces, glitter, colored glass, stones, and gold leaf.
To judge value, look at what you are actually buying:
- A taught skill set for measuring, mixing, coloring, pouring, and finishing
- Hands-on training with a heat gun and torch
- A guided workflow you can reuse for future projects
If you tried to DIY this at home, the cost can climb fast once you add quality resin, pigments, tools, and décor materials. Here, a lot of that foundation is built into your price so you can focus on making a successful set.
Also, the class max is 12 people, which supports a more personal experience than the big group “assembly line” model. That is part of the value, even if you do not notice it right away.
Who This Resin Coaster Workshop Is Best For
This works best if you want a creative activity that still feels practical. You will make something you use, and you will learn how to control a resin project instead of just following a one-time demonstration.
You will likely enjoy it if:
- You like hands-on crafts and you want step-by-step coaching
- You want a Maui souvenir that is not just a photo
- You want a gift with personal meaning
It is not the right fit if you are traveling with very young kids under 5 or if you are pregnant, since the class is not suitable for those groups.
Quick Practical Tips for Planning Your Resin Day
I’d treat this as an “art afternoon,” not a rushed side quest.
A few things you can plan around:
- The class covers PPE, safety prep, and resin technique, so arrive on time and stay attentive during instruction.
- You will work with slow curing resin, but your decorations and tool steps still need focus, so keep your schedule clear afterward.
- Since water and juice are included, you can stay hydrated, but you may want to plan on bringing your own snacks if you like a longer buffer (the data only confirms water and juice).
If you care about the final look, think before you pour. Decide your theme, then commit to a clean layout for each coaster.
Should You Book It? My Take on Making the Call
Book this if you want a Maui experience that trades a generic attraction for a skill-based souvenir. The biggest strengths are the full resin workflow you learn and the fact you leave with four functional, food-safe coasters that look like real art.
Skip it if resin tools or the class’s restrictions do not fit your needs. If you are traveling with someone who is pregnant or a child under 5, it will not be appropriate.
If you are on the fence because it sounds too craft-like, remember this is not just decorating. You are learning how to mix, color, pour, use heat tools, and finish professionally. That is the kind of knowledge that makes the coaster set feel like more than a one-off project.
FAQ
How long is the epoxy resin coaster set class?
The workshop runs for about 1 hour 30 minutes.
Where is the class located and what is the meeting point?
The start is 24 Luna Ln, Paia, HI 96779, USA. The activity ends back at the meeting point.
What do I make during the class?
You create a set of 4 resin coasters using food-safe resin, dried flowers and leaves, stones, and gold leaf.
What materials are included?
You get bottled water and juice. Decorative items like sea shells and ocean themed figurines (turtle, sea star, shark), sand, glitter, gem stones, colored glass, and more are provided to build your design.
Are alcoholic beverages included?
No. Alcoholic beverages are not included, and you are welcome to BYOB.
Is PPE included?
Yes. Gloves, aprons, and other PPE are included.
Do I need to know anything about resin before I go?
You will be taught how to measure, mix, color, and pour resin, plus how to prepare a mold and finish the pieces professionally.
What tools will be used?
The class includes instruction on working with a heat gun and torch.
Who can participate?
Most travelers can participate. The class is not suitable for children under 5 years old or for pregnant women.
What is the group size?
There is a maximum of 12 travelers.
Is the tour in English?
Yes, it is offered in English.


